Page 13
Page 1 - Page 2 - Page 3 - Page 4 - Page 5 - Page 6 - Page 7 - Page 8 - Page 9 - Page 10
Page 11 - Page 12 - Page 13 - Page 14 - Page 15 - Page 16 - Page 17 - Page 18 - Page 19
Page 20 - Page 21 - Page 22 - Page 23 - Page 24 - Page 25
April 2008
Another long time without updates but I am working on the car again now. There isn't really much
left to do so I should get moving!
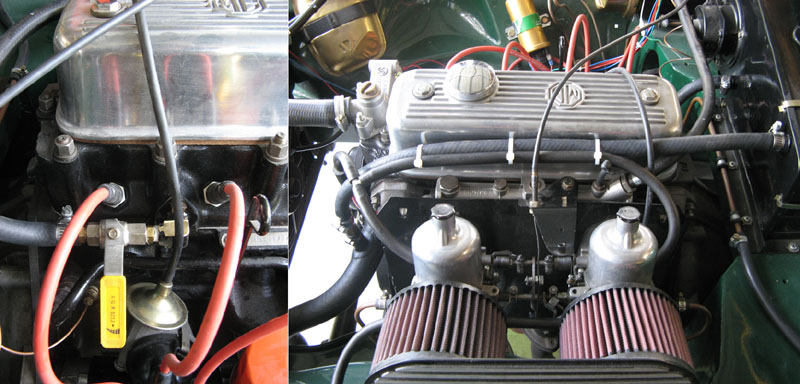
I did fix the starter solenoid by buying a new one. It was actually very reasonably priced and
it seems to be a quality Japanese made unit. That certainly fixed the problem and the car start fine
now. I also finished stripping and repairing the doors. I basically completed the welds where they
were just tacked before. So now they are totally sealed and with paint and filler they should be fine.
One other piece of luck was buying a new battery door on TradeMe. I do have one already but it is
missing most of it's Dzus fasteners. I got a second hand panel, already painted with all the
fastners in place for less than it would have cost to replace the fasteners along on my old panel!
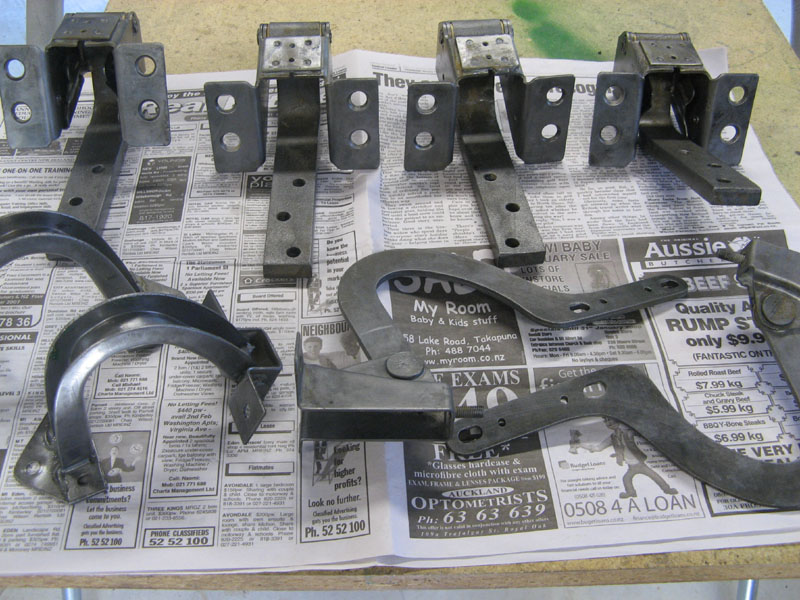
One other job I did was to strip the paint from the door, boot and bonnet hinges so these are ready
for repainting. I used a combination of paint stripper and wire brushes and they came up fine. I do
need to replace the rubber buffer blocks in the door hinges. I think I might be able to use rubber
feet of the type used under heavy electrical instruments perhaps.
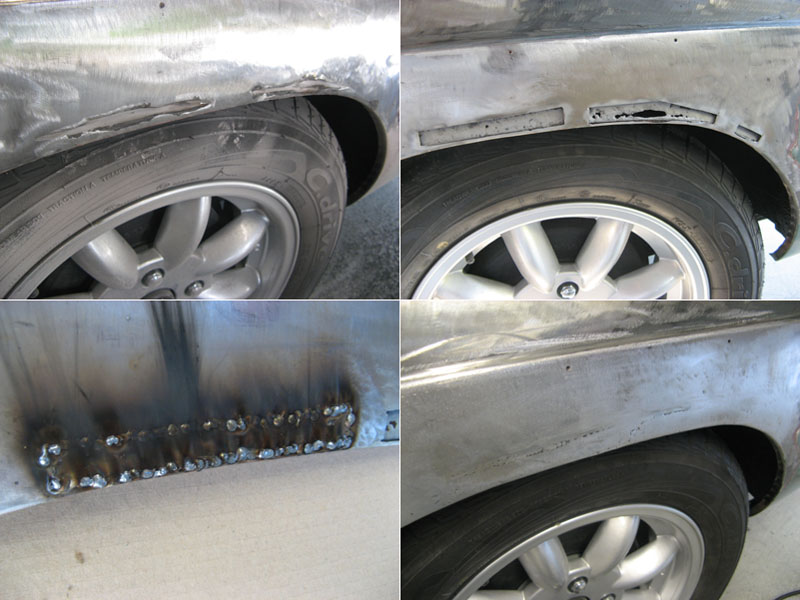
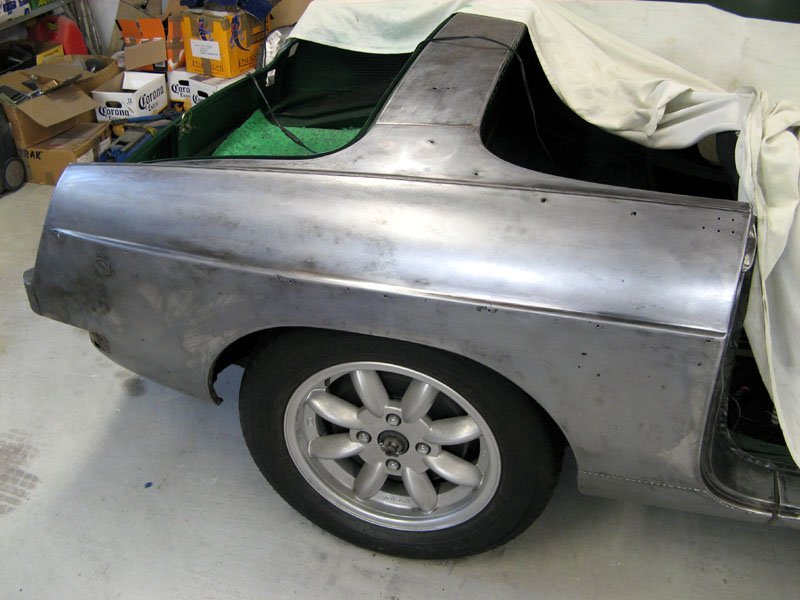
I have also starting stripping the rest of the old paint off the car. A really awful job! I am wire brushing
then using the random orbit sander with some 80 grit paper. I keep finding the DPOs sins. You can see
one of the worse ones. Above the left hand rear wheel I came across some filler. So, as usual, I started
removing it all to see what lurked beneath. In this case nothing! That point on the body is double
skinned. The outer body panel and then the inner wheel well steel. They had simply filled the rusty hole
from the outside! In fact the hole went all the way through once the rust was removed. This is the worst
way possible to 'repair' rust. I removed the huge lumps of filler and cut out the rusty steel. The holes
on the inner wheel well were not too big. On the outside I cut and welded in three patches to fill the
the holes. Before doing that I carefully sandblasted and rust killed all around the area to get rid of any
lurking rust. When the car is painted rust proofing will be liberally injected into the area from the
inside. It will need just a skim of filler to complete the repair.

I also discovered some small holes along the left rear beading. Not the beading itself although that does show
some pitting. I think I shall probably lead over these holes. Previously they were covered over in filler. I
also discovered both rear dog legs have been replaced (hopefully properly). The repair does look solid. You
can also see here the stages of stripping the paint off. First I use a wire brush on the angle grinder to
take off the top layers of paint and filler. That leaves me with a black surface. I am not sure if that is
original black etch primer like replacement panels come with or just left over paint from the wire brush. I
usually have to wire brush it again then use the random orbit on it to get to shiny steel. I am pretty sure
the car has been repainted in the past since when you get to bare steel there are all sorts of scratches and
sanding marks on it. Looks like someone sanded it back using a sanding disc on an angle grinder.
I need to finish off the stripping. Weld up some small holes (looks like there used to be sill covers on the
car judging by the screw holes in the sills) then finish repairing the front wings. I have some metal work
cut from a doner car kindly coming by way of Des in Australia. Once they arrive I can finish modifying the
area around the front lights. To keep the balance of MG karma in check I am sending some of my old gauges to
a chap down south. He wants to use them on his car.
June 2008
Today I started looking at modifying the front wings using the panels Des sent me. He had cut out the front lights
leaving a generous margin around the edges so I could cut out what I needed. I marked out lines with a marker
then cut out the parts I needed using a cutting disc on the angle grinder. After that I used paint stripper
the a wire brush to clean up the steel.

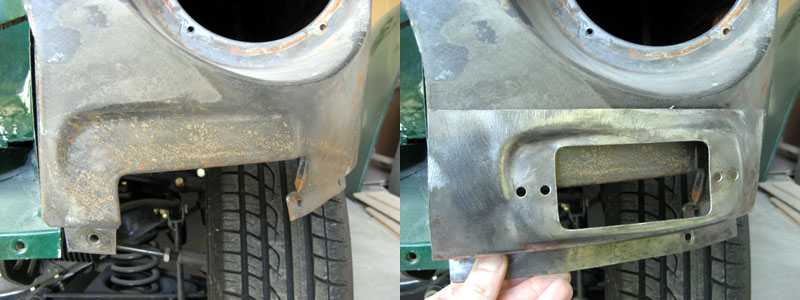
Next I will need to clean up the edges then cut out a matching hole in the front wings. You want the fit to be nice
and tight so you can get them welded in nicely. Cutting out the wing will be tricky but if you do a little at a
and file and sand it you can get a nice, tight fit. You can see how the new patches will fit in the picture below.
The patches Des sent actually come from an earlier MG and these had the front side lights out closer to the sides
of the car. I think the earlier style look better. The later ones seem a little too close to the grill.
I also did a little more paint stripping. So far the car is being sanded with 80 grit to get all the old gunk off.
Before priming I will sand with a finer grade of paper. The best thing to use seems to be the random orbit sander.
All the bare steel is wiped over with Kephos which is great for protecting the bare steel from surface rust
while I am working on it.
One other little job was replacing the heater valve. I don't have an new original valve and they never seem to work
well anyway so I replaced it with a 1/4 turn ball valve instead. From past experience I either had the heater
fully on or fully off. There is a slight leak somewhere I think but I can't figure out where from yet!

I also finished welding in the new front light mounting parts. Once you cut out the hole in the front wing you carefully
cut out the patch piece to fit. This takes a lot of tweaking to get it just right. Then you tack weld the piece in.
You can see once it was tacked in there was a corner that didn't quite fit. I carefully hand filed it until I could tap
it down into position with a hammer. Then you continue welding it in. You weld around the piece in spots rather than
trying to run a bead all the way along one edge at once. By welding one side then the other and alternating where
you weld you avoid heating one spot up too much and distorting the steel. Once welded all around you can sand
the welded areas. I am not good enough to get a totally invisible patch but with a bit of filler to cover the low spots
it should be invisible when painted. I did a quick test fit of the wings and front grille just to make sure everything
looked the way it should after modifying both wings in the same way.
Page 1 - Page 2 - Page 3 - Page 4 - Page 5 - Page 6 - Page 7 - Page 8 - Page 9 - Page 10
Page 11 - Page 12 - Page 13 - Page 14 - Page 15 - Page 16 - Page 17 - Page 18 - Page 19
Page 20 - Page 21 - Page 22 - Page 23 - Page 24 - Page 25