Page 18
Page 1 - Page 2 - Page 3 - Page 4 - Page 5 - Page 6 - Page 7 - Page 8 - Page 9 - Page 10
Page 11 - Page 12 - Page 13 - Page 14 - Page 15 - Page 16 - Page 17 - Page 18 - Page 19
Page 20 - Page 21 - Page 22 - Page 23 - Page 24 - Page 25
August 2009
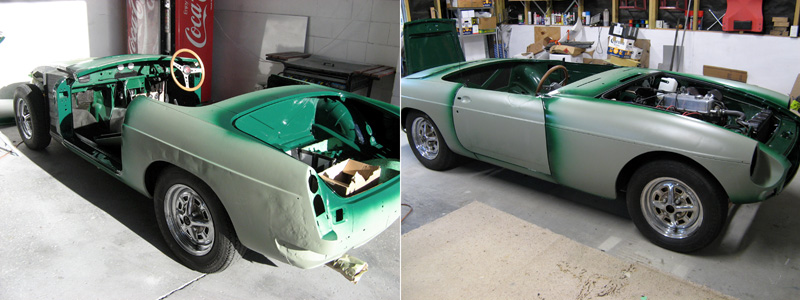
This is how the car looked when I collected her from the painters all done in etch prime. They painted
all the insides and door jambs and so on. The idea being I could then bolt things together and
then paint the whole car in one go at the end. I think though we'll take everything off again for
the final painting. Once back hope I re-attached the wings, doors and boot lid to get everything
all lined up again. Getting the doors right takes a long time as there are numberous adjustments
that need to be done. At least not the hinges are firmly attached to the A pillars so that adjustment
needn't be done again.
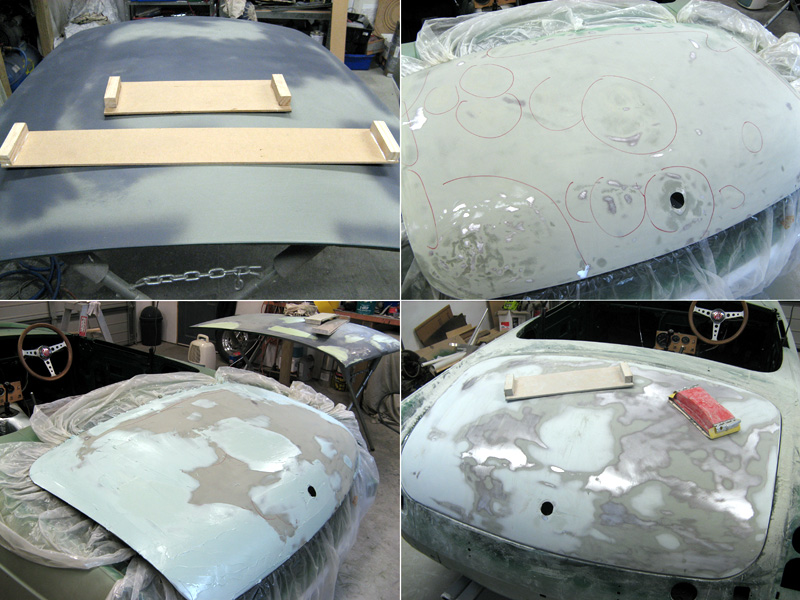
With the car back home I could start filling and sanding her. We call if bogging down here since bog is
local term for the filler. The painters gave me a 3 litre tin of Evercoat Z Grip filler. I made a
couple of flexible long boards out of thin MDF with wooden blocks at either end. I simply staple
strips of sandpaper to these ends. I start by sanding over the etch with 80 grit and that shows me
where the highs and lows are and keys the surface so the filler sticks. I then start skimming on the
filler. The boot lid and bonnet were the first I did and I didn't put enough on to start with so I ended
up going over and over them several times. I think it is better to cover the whole thing in filler then
sand it back. Once the filler is on there I starts sanding it. First with 80, then 150 then finally 240
grit. You use the long boards and alternate direction of sanding a lot to avoid getting flat spots. The
surface can look smooth but when you run a hand over it you can feel the imperfections. It takes hours
hours of work to get things nice and smooth. Each panel (a door, wing, boot, etc) takes me about 8 - 10
hours of work. Granted I have never done this before and don't know what I am doing but I can see now why
painting a car from bare steel costs so much with all the labour involved.
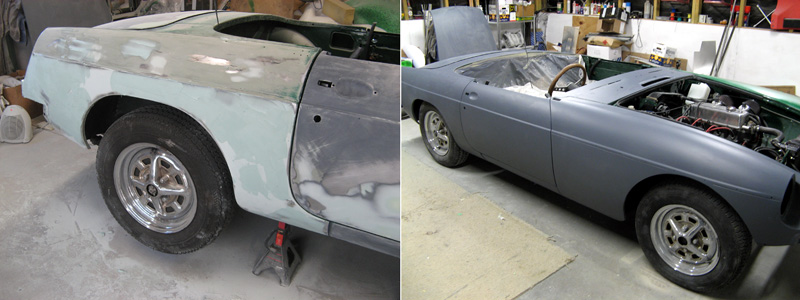
Here I was doing the rear quarter panel and you can see I covered almost the whole thing in filler then
eventually sanded most of it off. After filling and sanding it is imperative you seal the surface otherwise
the filler will absorb moisture from the air and this will eventually cause the steel underneath to rust
and the filler will fall out. Once done for the day you must spray a sealing coat of primer over your work.
I am using a 1K primer from the painters to do this. I am careful in my garage to always keep it warm
(with a small heater) and also keep the humidity down (with a dehumidifier) while doing this stage of
the car. Auckland is a humid place though so it can be difficult if it is raining a lot. And since I only
have time to work on the car in the weekends (since I need a straight 8 or more hours to get a panel done)
it means I need to wait for non rainy days.
You can see in the picture above I have now done one side of the car, the rear, the scuttle and the boot
lid. That's about 50 hours of work so far. So far I haven't needed more than about 1.5mm of filler (1/16)
in any one spot but it's the side of the car I haven't done yet that is more badly damaged!
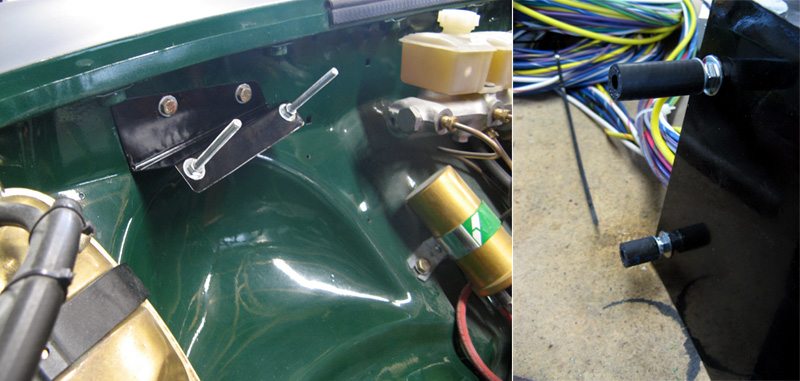
The last weekend it was raining and despite my dehumidifer running flat out it was too damp in the garage to
playing with filler. Instead I did a job I have meant to do for a while which is to mount my new fuse/relay
panel. I got a new wiring loom some time ago from Advance Autowire (http://www.advanceautowire.com/). They
make a vastly upgraded wiring loom for MGs which includes this monster fuse panel with modern blade fuses
and a lot of relays to power things on the car. Originally everything was powered though the actual dash
switches themselves. This can cause voltage drops resulting in things like burned out switches and dimmer
headlights. The new panel is much bigger than the original four fuse holder the MG came with. I decided to
mount it in about the same place though and made up a custom bracket to hold it. I only hold the top of the
panel in place and the bottom has spacers made from rubber fuel hose as standoff to hold it in the right
place on the firewall. You can see the top bracket and the uneven standoffs for the bottom above.
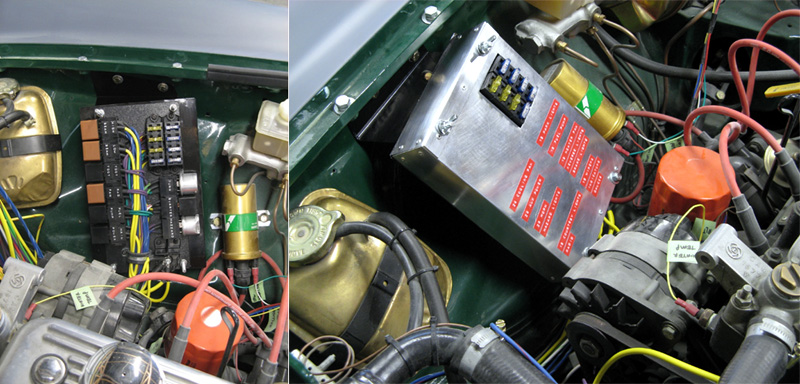
I mounted the panel (with a stainless steel backing plate) via long threaded studs. The studs in turn
hold in place a light aluminium cover that goes over the panel. I used wingnuts to hold the cover on
so it is easy to remove it if necessary (I will have to see if the nuts work loose over time). I used an
old style Dymo label maker to make up the labels saying what the fuses are for and stuck them to the
cover. It's what Barney in Mission Impossible would have done! Since I haven't done the wiring I will
remove the panel until after the car is painted. I want to try to make a small, clear plastic cover to
go over the fuses themselves. It needs to be clear since Advance supplied fancy fuses with little LEDs
in them that light up when a fuse blows so you can see right away which one is bad!
Page 1 - Page 2 - Page 3 - Page 4 - Page 5 - Page 6 - Page 7 - Page 8 - Page 9 - Page 10
Page 11 - Page 12 - Page 13 - Page 14 - Page 15 - Page 16 - Page 17 - Page 18 - Page 19
Page 20 - Page 21 - Page 22 - Page 23 - Page 24 - Page 25