Page 23
Page 1 - Page 2 - Page 3 - Page 4 - Page 5 - Page 6 - Page 7 - Page 8 - Page 9 - Page 10
Page 11 - Page 12 - Page 13 - Page 14 - Page 15 - Page 16 - Page 17 - Page 18 - Page 19
Page 20 - Page 21 - Page 22 - Page 23 - Page 24 - Page 25
December 2009
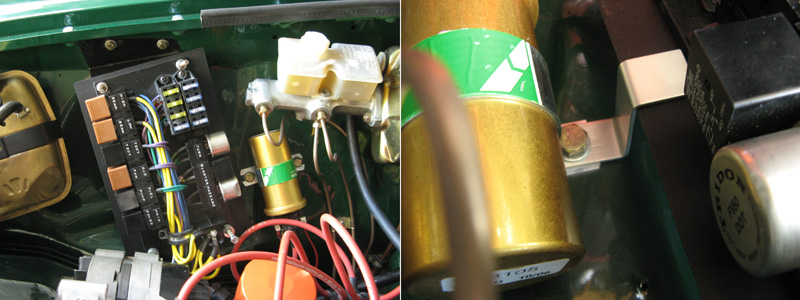
The power board I had figure out how to fit previously. I remounted it and added in a bracket to
help hold it down bolted under the coil. The coil is a Lucas sports coil of course.
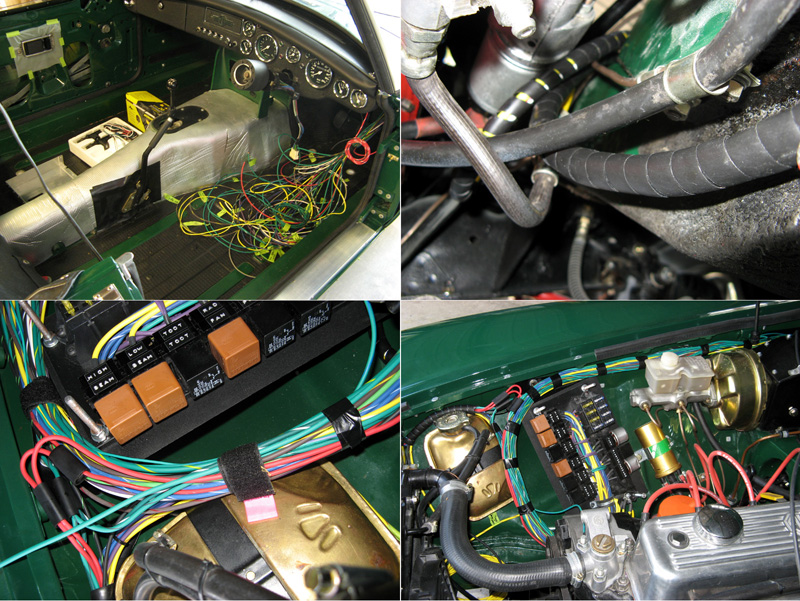
Ah, the wiring. Four little photos to describe what was hours and hours of work. The loom I am using
isn't original but is rather a modern one from Advance Auto Wire in the states. The loom uses
much thicker wire than original and also provided more relays and fuses than normally found in
an MGB. Most of the wires come from the power block so with that mounted I could start routing cables.
A large bundle passes through the firewall into the dash area. A smaller bundle goes under the car
to the starter, gearbox then onto the rear of the car. I started from the furthest points and worked
in carefully routing the cables. I find velcro straps handy to temporarily hold the bundles until you
are done. The wires are colour coded but I also added masking tape to each end labelling what they
all were. With the wires in place I bound them with wiring loom tape. This is different to
normal PVC electrical tape in that is isn't as sticky so won't leave as much residue. After the loom
was in place I put sprial wrap over it all for protection.
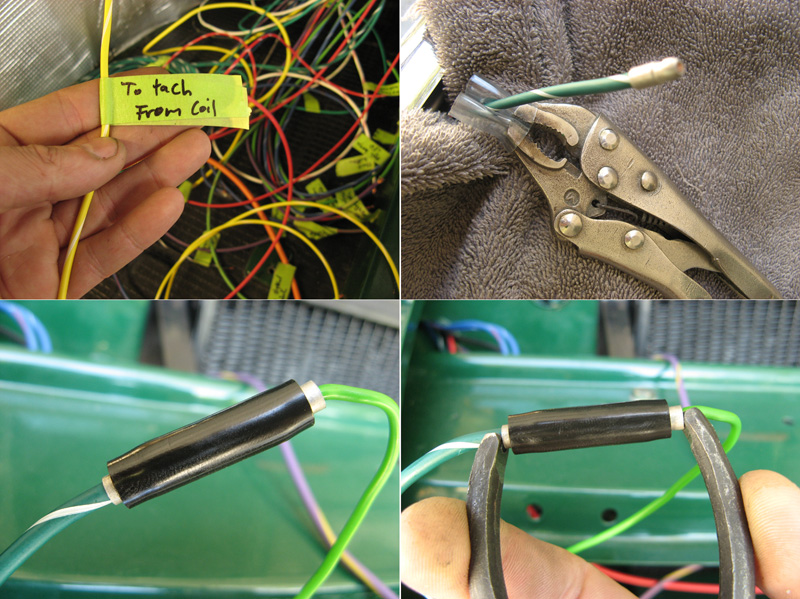
All connections were crimped then soldered then, in the case of spade types, heatshrunk. It pays to use the
right crimp tools. Don't try using the cheap ones you get bundled with things. They are rubbish. The
bullet connectors were soldered by holding the wire in place with vice grips with plastic tubing on
the jaws so as not to damage the wires. You strip the wire, put the bullet over the top, heat it with
a soldering iron then feed solder in through the small hole in the top. To push the bullets into the
connectors I used a tool as described on Paul Hunt's site
made from the handles of an old pair of pliers. These worked a treat! I must admit the wiring took
me ages. Not because I didn't know how. Electronics has been a hobby of mine for years and I paid
my way through uni working as an electronics technician and again when I was on my OE in England. I
am very familiar with wiring and soldering and so on. Just to do a good job and do it well does take
a long time. A lot of it has to be done squished into the footwells and trying to reach up behind
the dash. Definitely a job you can't rush if you want to do it well.
While doing the wiring I also fitted an alarm. More bloody wiring to add! I fitted it up under the
passenger side of the firewall. The siren is mounted under the bonnet on the flat space to the side
of the heater unit with wires running into the car. I fitted an microwave sensor to the alarm
that fits under the carpet of the transmission tunnel pointing up. Anyone entering the car or even leaning
over it with the top down will trigger the alarm. The microwave sensor will work fine through fabric and
carpet but steel will block it.
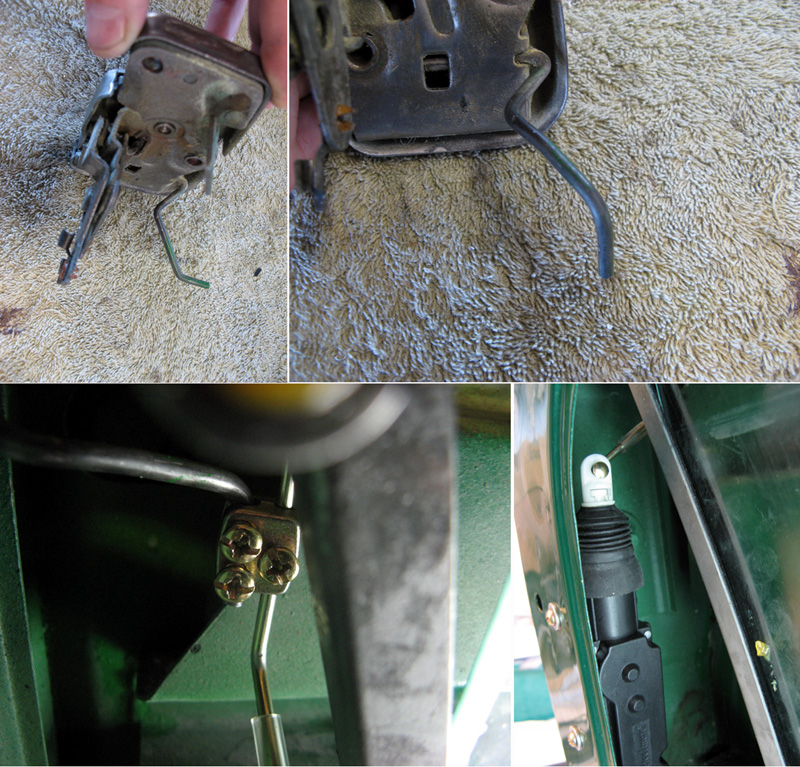
The alarm also had a central locking output so, as seen earlier, I removed the external door locks and
added central locking actuators instead. These are mounted in the rear of the doors. The work by
pulling or pushing on a pull rod. I found I was able to bend the rod on the lock that the normal
key lock operates. By twisting it through 90 degrees I was able to get it to point downwards. Then
it can easily be connected to the actuator push/pull rod with the little metal connector blocks that
came in the kit. To be honest I am not sure door locks are really needed on my B since I almost
always have the top down anyway!
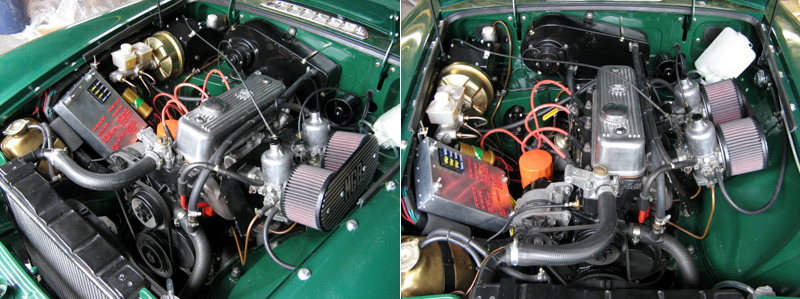
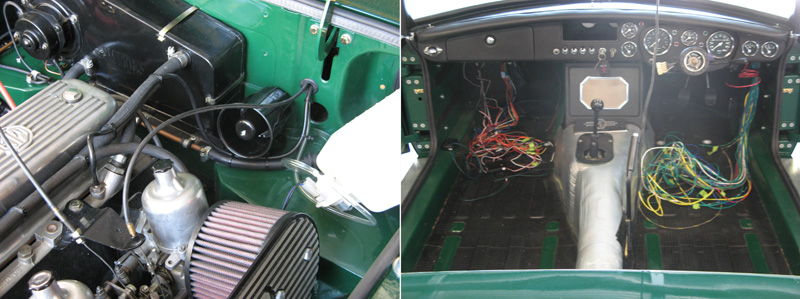
Finally the engine bay with the wiring and alarm in place. I also added a windscreen washer bottle which
is the white thing to the top right. I had to angle it somewhat to make it fit but it still holds
plenty of fluid. That also doesn't get much use because I tend to always have the top down!
Page 1 - Page 2 - Page 3 - Page 4 - Page 5 - Page 6 - Page 7 - Page 8 - Page 9 - Page 10
Page 11 - Page 12 - Page 13 - Page 14 - Page 15 - Page 16 - Page 17 - Page 18 - Page 19
Page 20 - Page 21 - Page 22 - Page 23 - Page 24 - Page 25