Page 24
Page 1 - Page 2 - Page 3 - Page 4 - Page 5 - Page 6 - Page 7 - Page 8 - Page 9 - Page 10
Page 11 - Page 12 - Page 13 - Page 14 - Page 15 - Page 16 - Page 17 - Page 18 - Page 19
Page 20 - Page 21 - Page 22 - Page 23 - Page 24 - Page 25
January 2010
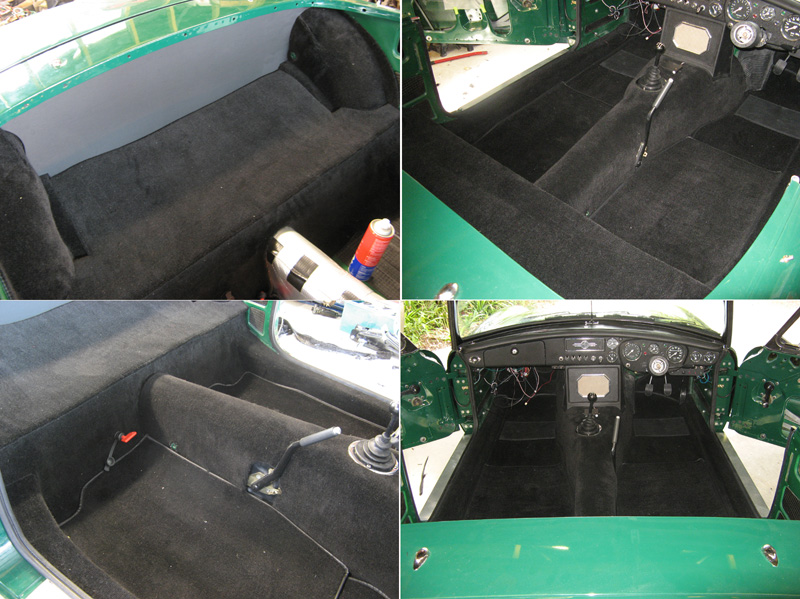
With the wiring mostly done I started adding the trim. I bought a carpet set from Moss in the UK. Not
the best but not too bad. Fitting that was relatively easy. Just take your time and use a good spray
adhesive. 3M make the best ones to use I found. Some of my alarm wiring runs under the tunnel
carpet so the alarm wiring was left loose until the carpets were in place. The carpets on the sills,
rear wheel arches and heelboard are glued in place. The rear deck is held by clips since this needs
to be removable to get to the battery. The rear floor carpets are held under the seat rails and the
front carpets are held by clips. The transmission tunnel carpet I didn't glue since it goes under the
floor pieces and tends to stay in position well by itself. I did find it was a bit loose over the
rear of the tunnel between the seats so I cheated and padded that area up a bit with some thin foam
under the carpet. This isn't noticable at all. You can also see above the red battery cut out I mounted
on the heel board. It is a great safety device and I also use it as an anti theft device. I remove the
key when I leave the car. The alarm (and clock) is wired direct to the battery so that still works with
the key removed.
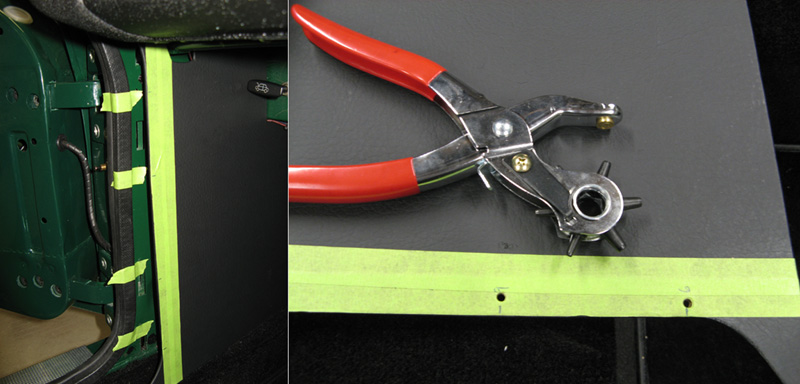
I also bought a new trim panel set. These are fitted with screws and small cup washers. Since my body already
had all the screw holes I used masking tape to mark the positions of the holes in the body horizontally
then transferred those horizontal measurements to the trim panel onto another piece of tape stuck to the
panel itself. To get the distance fomr the edge I simple used a ruler to measure in from the panel edge.
With the position marked I used a leather punch to punch holes though the panels for the screws to pass
through. Where the edges of the panels meet the door seal trim there were some small gaps where body
coloured paint showed through. I simply taped some black vinyl offcuts to the body work in those places
then put the trim panels over the top.
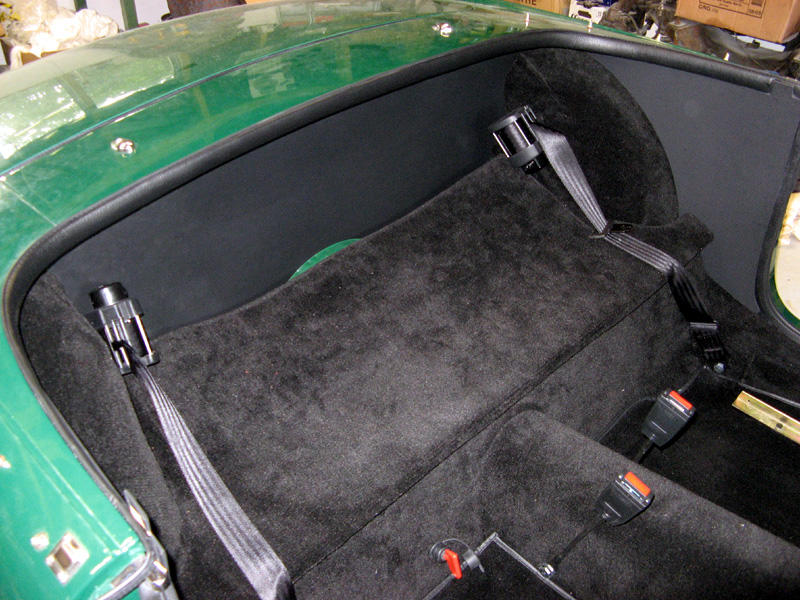
The seatbelts were easily fitted to the mounts provided. You have to get the angle right on the retractable ones
for them to work correctly. You also need to be careful when folding the soft top that this doesn't foul
the belts.
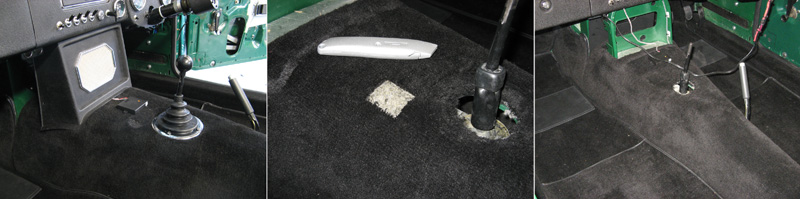
In the picture above you can see the microwave sensor sitting on top of the carpet. It actually goes under that
carpet in use. While fiddling with the alarm wiring I had a small disaster. My inspection lamp, with a normal
bulb, came loose and was sitting on top of the carpet. This ended up melting a patch just near the gear lever!
That wouldn't have happened if I had used the expensive wool carpet I guess. I ended up cutting out the
melted square and gluing in a matching piece from one of the carpet offcuts. It isn't noticable unless you
really look!
February 2010

With the carpet and trim in I made a cover to hide the alarm under the firewall. This is made from 6mm thich MDF
that I covered in foam padding then some black vinyl. It simple bolts up to the firewall and covers the
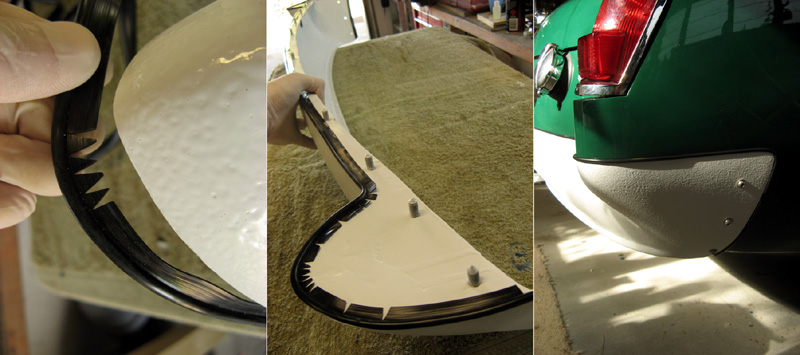
To make a nice joint between the fibreglass valences and the body I used some black fenderwelt. This I simply cut and
superglued to the valences. The glue doesn't need to hold for long since the fenderwelt is nicely trapped between
valence and body once the bolts are done up tight.
March 2010
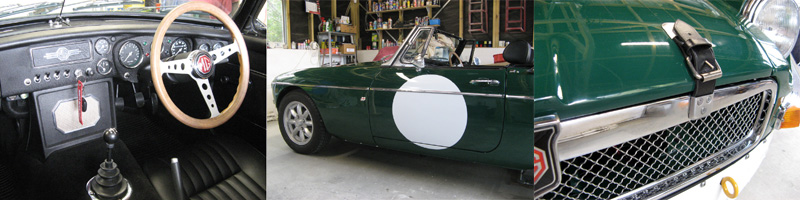
Finally everything was in place. I bolted in the seats and I had the car taken back to the panelbeater and had the vinyl
number roundels applied. Just the roundels, no numbers! This isn't really a race car. If anyone asks about it, and lots
do, I just say she's retired from racing! I also added a leather bonnet strap just to add to the rally look. From here
the car was ready to be certified!
Page 11 - Page 12 - Page 13 - Page 14 - Page 15 - Page 16 - Page 17 - Page 18 - Page 19
Page 20 - Page 21 - Page 22 - Page 23 - Page 24 - Page 25