Page 3
Page 1 - Page 2 - Page 3 - Page 4 - Page 5 - Page 6 - Page 7 - Page 8 - Page 9 - Page 10
Page 11 - Page 12 - Page 13 - Page 14 - Page 15 - Page 16 - Page 17 - Page 18 - Page 19
Page 20 - Page 21 - Page 22 - Page 23 - Page 24 - Page 25
November 2004
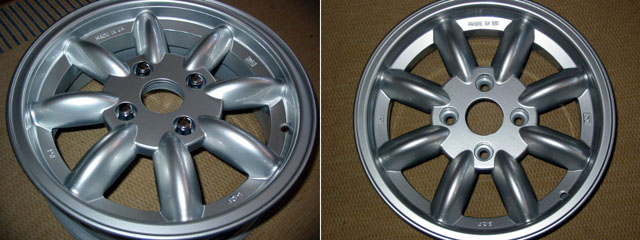
My UK minilite replica wheels arrived from England after only a week. I am pleased with them and I
think they certainly look better than the local variety.
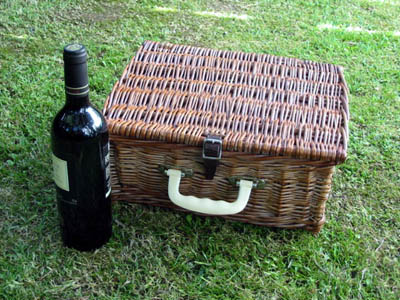
I wanted to get a small picnic basket to keep in the car when it is done but all that is available
these days are cheap and nasty ones. I wanted one that will last. I saw this small basket
on TradeMe and bid and won (mine was the only bid). It is English Willow and probably from the
60s. Even that old it is much better quality than the ones around today.
December 2004
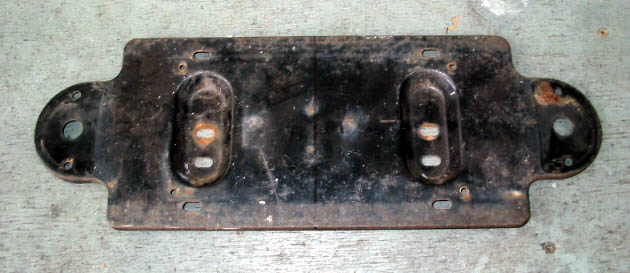
This is the original American numberplate holder. It isn't wide enough for the NZ plates and it
also had awful lights attached to either end (removed here but visible on the original car pics).
I cut the holder in half down the middle then welded in a piece of steel 70mm wide. The holder is
now wide enough to fit a NZ plate. I also welded up any extra holes and drilled new ones to match
the holes in a standard plate. Instead of the huge yank lights I am fitting the smaller UK style
ones that are the same as the light on the left hand side of the dashboard. I rescued those off
an old Austin 1100 at the local junk yard.
January 2005
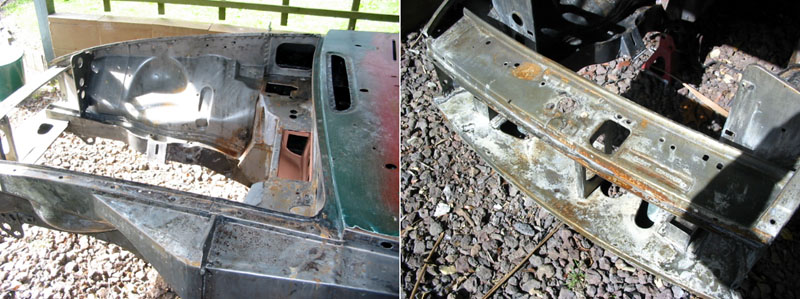
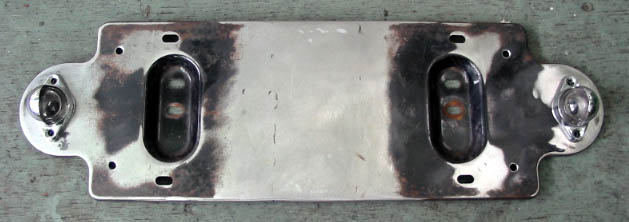
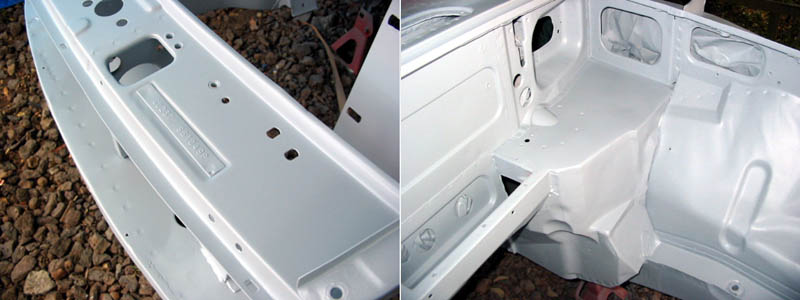
Finally we have some fine weather so I am painting the engine bay at long last. I had to clean up
the steel again. It is already stripped and sanded but it needed degreasing and some surface rust
removed. It took me about 5 hours to fully reclean the steel ready for painting. The picture
above is before the cleaning and the one below is afterwards.
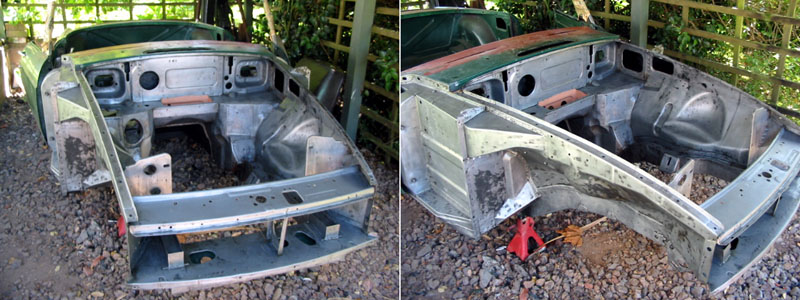
Once cleaned up I painted on DP40 etch primer. When dry I sand that slightly (to roughen the surface).
Then I spray normal primer and allow to dry overnight. The next day that is sanded with 400 grit
paper to get everything nice and smooth. Then I spray the colour coat and finally the clear coat,
which is what will give the paint its shine.
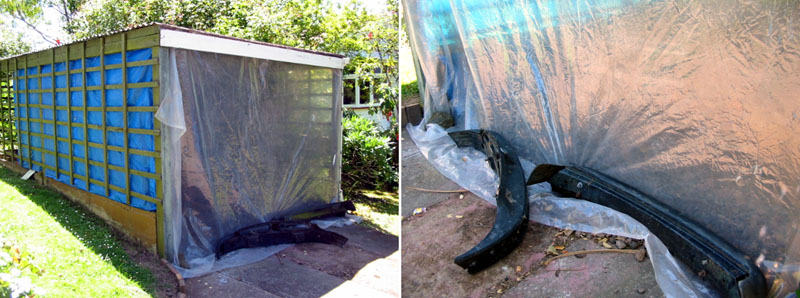
Since the car is in the carport I rigged up a temporary spray booth by closing off the front and one
side of the carport. I finally found a use for the horrible rubber bumpers I removed!
I should say I have never sprayed before. Spraying the primer was fun but I was a bit nervous. It
seemed to go OK though. They say you need to keep the gun a fixed distance from the surface and
move parallel to it. Fine when you're practing on a flat bit of cardboard but bloody impossible
when spraying a car with curves. I also soon found out you need to work out the order to paint so
you can get to everything without messing up what you've done by getting the air hose over it.
Some places were hard to paint with the top fed gun since you have to tip it at some weird
angles. I managed not to get any runs but did get some spots when I tipped the gun too far and
some paint came out since I didn't have the lid on tight!
Hmmm, I hope it isn't windy tonight and my spray booth is still there in the morning!
Sprayed in DP40. Then disaster. The hardener for the primer and the clearcoat has gone off. I guess
I had to wait too long to use it. Damn you crappy Auckland weather! Damn you to hell! Guess the
poor old girl has to live in primer until I can get some more paint next week.
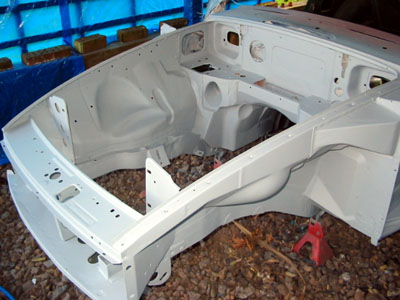
Today I went and got new primer and paints. They gave them to me for free! Eventually I will take the
car to them to get the outside done properly. I am no painter. But I feel confident I can get some
colour into that engine bay. This is the car done in primer. Had a couple of small runs I will sand
out before putting the colour on.
Oh bugger. I have just realised this web page has become a kind of car blog. If the paint doesn't
kill me, someone shoot me.
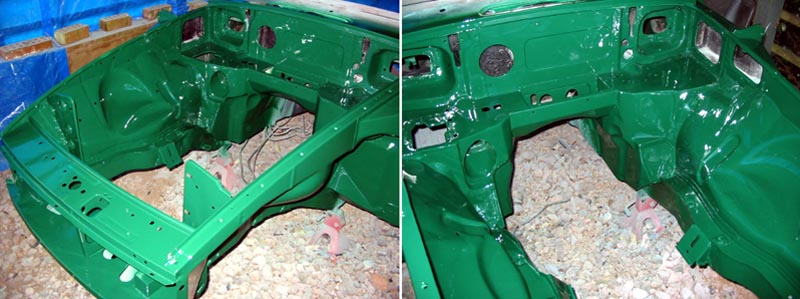
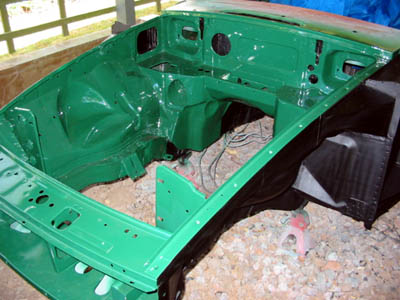
I finally got to shoot the colour and clearcoat! And it came out OK. Not perfect but then this isn't a
show car so I am happy with the result. And the colour. I thought it might be a bit light but I do
like the brightness of it. The colour is PPG Lotus British Racing Green (0007). The Lotus green
seems to have more yellow in it (Jaguar BRGs seem to have more blue). I did learn a few things
while spraying the colour and now I understand why people pay professionals lots of money to do
this!
Things I discovered:
1: When you're wearing all the safety gear and it's a nice sunny day and you're spraying in what is
effectively a small green house it gets very, very hot. I did manage to get sweat drops on the paint
and I found that it is impossible to put rubber gloves on over wet hands! When I was done I took the
gloves off and literally poured the sweat out of them.
2: It is very hard to get paint everywhere since there are some places you just can't get the gun
to point at. On the other hand it is very easy to hit bits you've just painted with the gun, the
air hose, your arms, head, etc. Planning the order you are going to spray things is very important!
3: Make sure the containers you are mixing the paint in are big enough to hold it all. A jug and a
cake mixing bowl had to be quickly found in my kitchen and sacrificed for the cause. The containers
I had bought were big enough to hold all the paint but too small to allow me to stir it well without
it spilling over the top.
4: Make sure you screw the lid onto the gun pot properly. I was very pleased I managed to get no
paint runs at all! I did manage however to get a rather large paint blob where I tipped the gun and
paint spilled from the lid. This landed right on the flat panel in front of the radiator which was,
up until that point, the nicest, flattest part in the engine bay. It didn't run but there is now a
slightly noticable bump in the paint.
5: No matter how clean and careful you are some damn bug/bit of dirt/piece of fluff will get onto
the paint. And you can be certain it will land in the most annoying and visible place. Half the
paint I sprayed will not actually be seen since it is inside the front wings but of course I
managed to get a speck right on same flat panel I dropped the paint on as mentioned above!
Still, I shall put the imperfections down to learning and call them 'character' on the car. I am
glad I did it but I am really, really glad it is over!
It is also hard to photograph properly as the surface is very glossy and it is hard to catch the
true colour of the paint.
I sprayed the inside of the wheel arches and the underside of the car in underseal. This is black, tar
like stuff that protects the paint and steel. It is supposed to help prevent rust and also adds
some sound deadening. Most of the bits I sprayed are not visible when the car is back together
and when the engine is in.
Page 1 - Page 2 - Page 3 - Page 4 - Page 5 - Page 6 - Page 7 - Page 8 - Page 9 - Page 10
Page 11 - Page 12 - Page 13 - Page 14 - Page 15 - Page 16 - Page 17 - Page 18 - Page 19
Page 20 - Page 21 - Page 22 - Page 23 - Page 24 - Page 25