
October 28th 2007
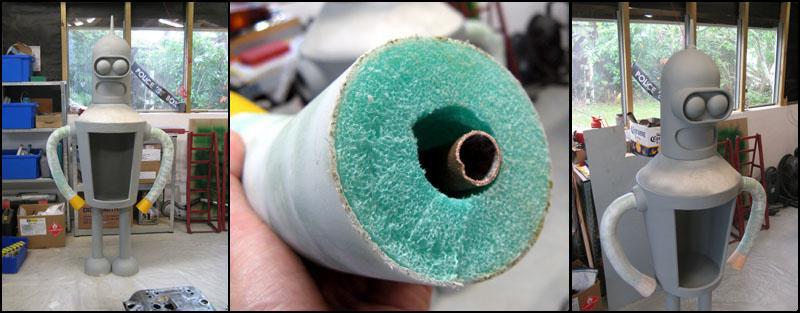
Figure 16. Making the arms shorter.
People are probably wondering about the lack of updates. It's not due to a lack of progress, more due to the fact the work being done is tedious and boring. I have been continually coating Bender in resin and sanding Q cells (small glass beads mixed in with the resin to bulk it up and make it easy to sand smooth) and then sanding him back to get a nice smooth surface to him. In the pictures above the head, body and legs are all covered in one of many layers of grey primer. The right arm is whiter than the left because it has a heavy coating of resin and Q cells still waiting to be sanded smooth. For the sanding I use an electric random orbit sander. You need to make sure you wear a good dust mask so you don't inhale any of the sanding dust. It is best to sand outdoors too due to the amount of dust created. Unfortunately that left me at the mercy of the weather meaning I could only work on Bender on fine days.
I also added the hands which are made from two plastic cups cut to size. They were hot glued to the ends of the arms and then a circle of wood was hot glued into the open end to close them off. The whole hand was then covered in several layers of fibreglass and faired smoothly into the arms. About this time I decided I had messed up and made the arms a bit too long. So I took a hacksaw and chopped a 100mm section from the middle of each arm. The image above give a good cross sectional view of one of the arms. To rejoin the two halves I used more hot melt glue (wonderful stuff!) and masking tape wrapped around the outside. Then several layers of fibreglass over that. Once sanded smooth the join is strong and invisible.
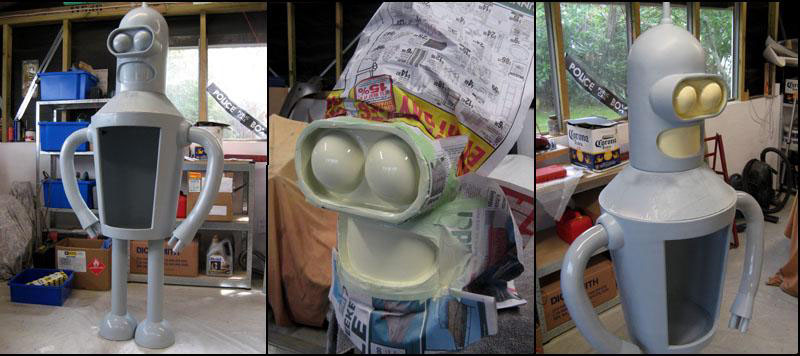
Figure 17. Final painting.
Once everything was sanded smooth and covered in sanding primer (and sanded yet again) I applied the top coats. I used a custom mix of grey paint for the overall colour. The paint I am using is Dulon car paint. I had to take a Futurama comic book to the paint shop to ge the colour matched accurately. That turned out to be difficult as in the comic they use different shades of grey all the time. I picked something representative and gave Bender a good number of coats of it using a spray gun and air compressor. One problem with using car paint is it is typically designed to be glossy straight out of the gun. Bender came out too shiny! You can see the gloss in the first picture. Now despite Bender always commenting on his shiny metal ass it actually isn't that shiny. In fact Fry mentions this in the pilot episode. To get around this I had to wait until the paint was dry then go over the whole thing with a fine flexible sanding block. This took the shine off the paint and gave Bender a more accurate matt look. In the last picture you can see the arms are still very glossy while the body and head are now dull.
Before painting the arms I added the fingers which are simply pieces of wooden dowel hot glued into place. To make sure they don't break off I drilled them down the centre and added a smaller dowel that fits into holes in the wooden end plate of the hands. Unfortunately I made a mistake painting the arms. The arms and legs (and antenna) are actually a darker shade of grey from the rest of the body. I had a hard time finding a spray can that matched the right colour. I tried several but didn't get the shade I wanted. I didn't want to have to get a whole litre of custom paint made up for those small areas that needed painting. In the end I discovered that the zinc rich primer I use when welding was actually about the right shade. I sprayed that on the legs and that worked great. When I tried it on the arms however it reacted with one of the test coats of paint I had tried (just on the arms). I had to sand all the paint off the arms again and then re-spray them.
The eyes and mouth, which most people are surprised to find are yellow not white, were sprayed using spray can paint. I had to mask of the rest of the head with tape and paper then sprayed a number of coats to build up a nice depth. I left the eyes and mouth glossy.
You will probably notice here that the shoulder section still looks very rough. This part I am leaving till last as I want to build it up so the joint between the body and bottom of the shoulders is nice and accurate. At the moment the shoulders are slightly smaller than the top of the body leaving a small step in the join. The head is just sitting on top of the shoulders and it is easily lifted off but it is located in position by two wooden dowels. These protrude up from the shoulders into small holes in the bottom of the head.

Figure 18. Mounting the brain inside the head.
One thing I have been wondering about for some time was the best way to mount the brain inside the head. The solution in the end was quite simple. I simply bent the aluminium bracket I used as a stand to sit the brain on into a square J shape. I then bent a piece of brazing rod into a simple hanging bracket that is screwed up into the top of the head. The brain simply hooks over that rod and hangs freely inside the head. The switches and controls are at the base of the hanging brain so you can reach them from inside Benders body. I am still not sure the best place to put the speaker for the voice. Inside the head the sound is somewhat muffled so in practice the speaker may need to sit inside the body on top of the beer keg. I will wait until the door is finished then figure out the best placement for the speaker then.
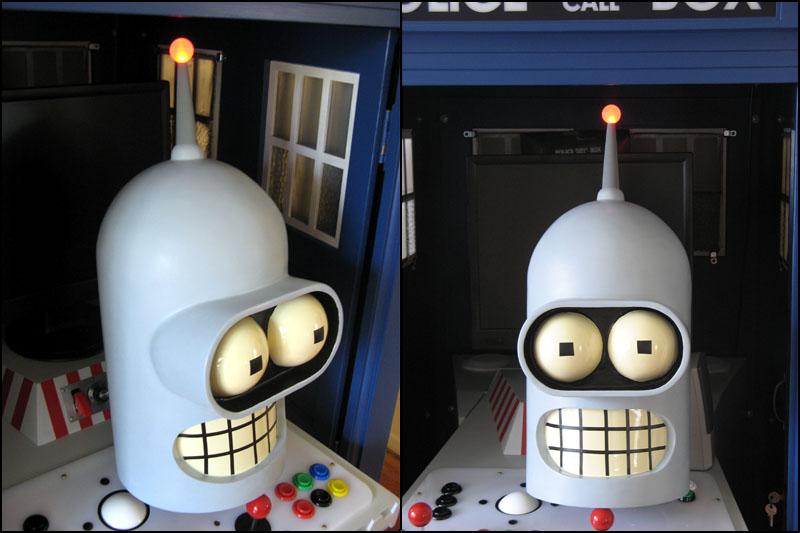
Figure 19. The completed head.
Once the eyes and mouth were painted and the brain mounted I finished up the rest of the head. Around the eyes I painted matt black paint using a small brush and a small touch up jar of paint. The eyes and mouth lines are made using black car insulation wiring tape. This is different to normal insulation tape in that it is very low tack (since in a car normal insulation tape will turn into a gooey mess over time). The tape can easily be peeled off if I want to change the shape of his mouth later on. For now I went with the square look. The ball on the top of his antenna lights up red when a button on the remote is pressed to make him speak.
November 25th 2007
Bender is finally complete! I finally finished off his shoulders and his door which is made from real sheet steel. To make the door I first marked out the rough dimension on a sheet of steel ensuring that the piece of steel was bigger than the opening in the body. I am using thin car panel steel which is only about 0.8mm thick so easy to work. I then roughly made the curve in the steel using my welders gas bottle as a former. It is easy to carefully bend the steel around the tank starting at one edge and working around to give an nice even curve rather. Once the bulk of the curvature was formed in the steel small adjustments were made simply bending it by hand.
After the curvature was such that it matched the profile of the body I temporarily taped it in place over the opening then I was able to scribe a line from inside that matched the hole for the door. When cutting the steel I found the easiest way to get a nice smooth line was to lay a strip of masking tape along the steel and use the edge of that as a line to cut against using Gilbow metal snips.
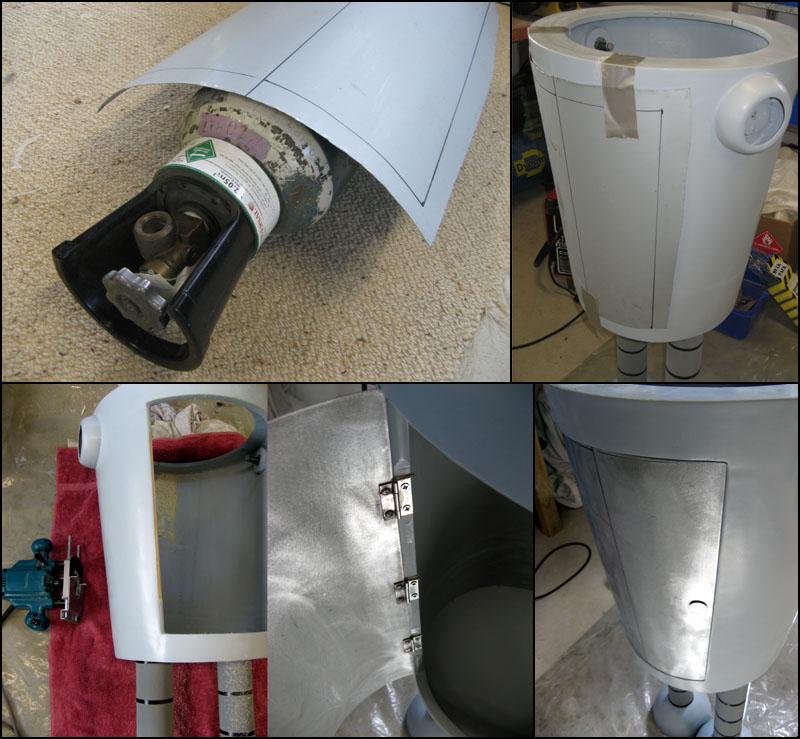
Figure 19. Making and fitting the steel door.
To hinge the door I used three small metal hinges. I ground the end off and removed the pins which I replaced with short lengths of brass welding rod bent so I can easily remove the door again if I need to. One half of each hinge was simply MIG welded to the door. The other side of each hinge was screwed into Benders wooden frame. I did have to do some minor surgery with the router to get a flat surface on the framing dowels to screw each hinge down to. The door is held in place with a simple magnet on the right hand edge. The door knob is simply a small disc of steel slightly curved to match the profile of the door. It has a smaller curved washer under it to make it stand off the door panel by a mm or two. These were then welded to the door.
After finishing the door I also finished the shoulders which was a simple matter of building up the surface with fibreglass and body filler then sanding it smooth so it matched the bottom of the head and the top of the body. Benders head can be turned by turning the head and shoulders together.
So finally Bender is complete!
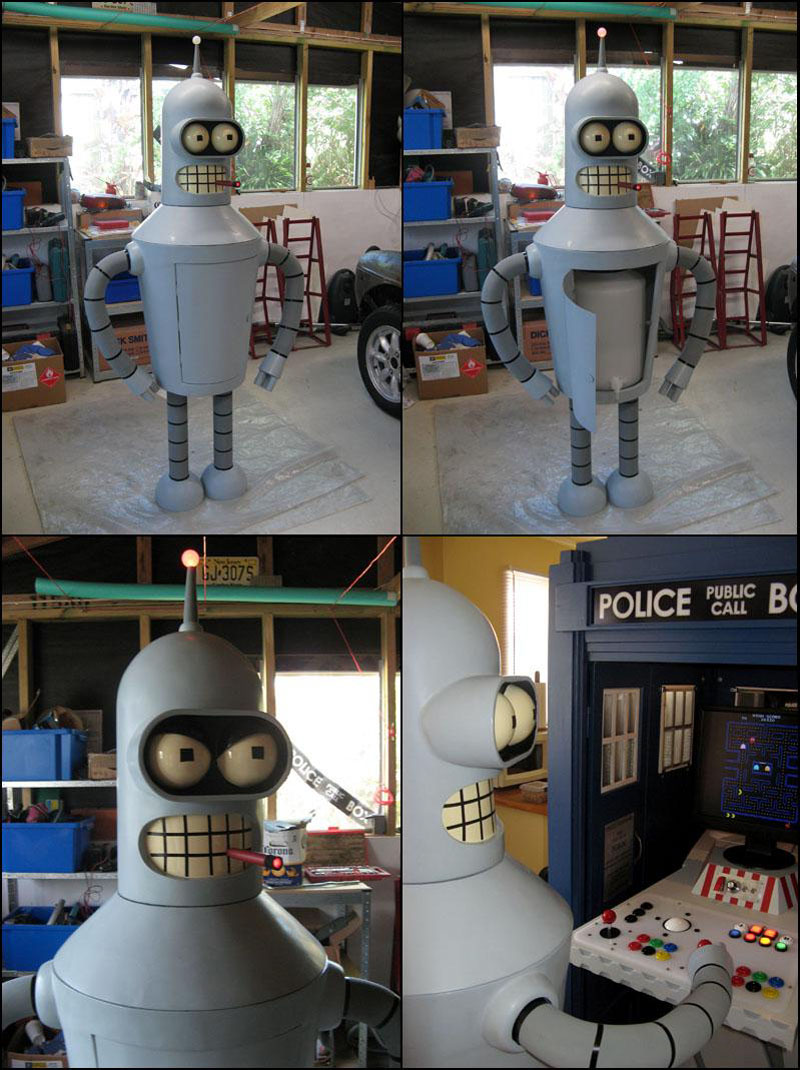
Figure 20. Bender complete!
Here is Bender still in the garage where he was born, errr, made. Soon he will be venturing out though. You can see him here with his door painted to match the body and you can see how the beer brewing keg fits inside him. The beer tap rotates so the door can be closed over it. Don't mention the placement of the tap. It makes Bender angry as you can see in the lower left.
His scowl I made from a left over polystyrene sphere the same size as the one used for his eyes. I wrapped it in tin foil then added several layers of fibreglass. Once that had dried I sanded it all smooth then using a hacksaw I cut out two sections similar to the sections you get when you cut an orange. I epoxied these to a flat plastic base and painted the whole thing with the same matt black paint as used around his eyes. The scowl can then be clipped into place as needed over the eyes and held in place with a small blob of Bluetac.
The cigar was made from an old whiteboard marker pen I cut up and painted. The burning end is made from black felt with a disc of red felt in the end. Inside the marker I have a small penlight torch which when switched on causes the red felt to glow. The cigar is held in place with a strong magnet in the base with another inside the head attracting it into position.
Finally a picture of Bender playing one of his favourite computer games!
Still to come is the actual brewing of beer.
Next page 4Back to page 2