Page 21
Page 1 - Page 2 - Page 3 - Page 4 - Page 5 - Page 6 - Page 7 - Page 8 - Page 9 - Page 10
Page 11 - Page 12 - Page 13 - Page 14 - Page 15 - Page 16 - Page 17 - Page 18 - Page 19
Page 20 - Page 21 - Page 22 - Page 23 - Page 24 - Page 25
November 2009
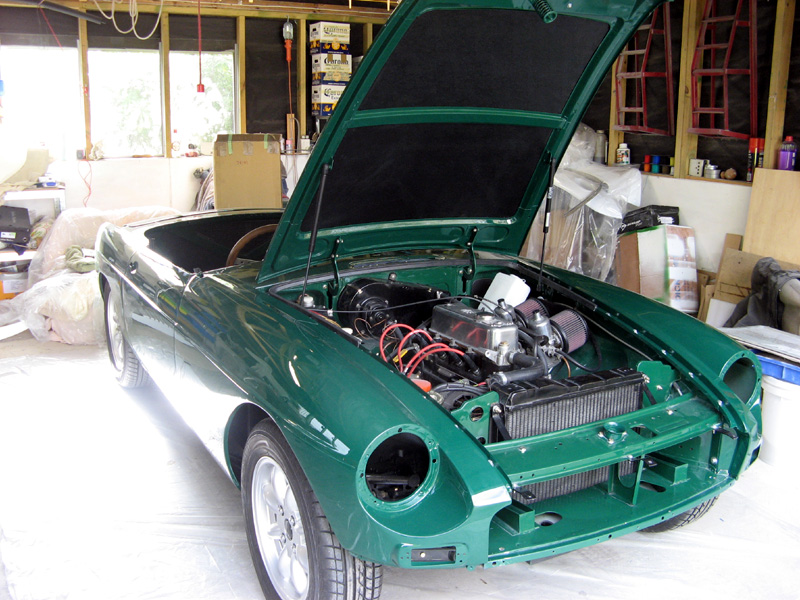
And here is the car home for final assembly. At the point I have all the panels on. Before we attached
the bonnet I glued on the bonnet insulation using Ados F3 glue. It is much easier to do this with the
bonnet sitting upside down off the car. The car is sitting on top of a giant plastic sheet in
preperation for the next stage, rust proofing and undersealing.
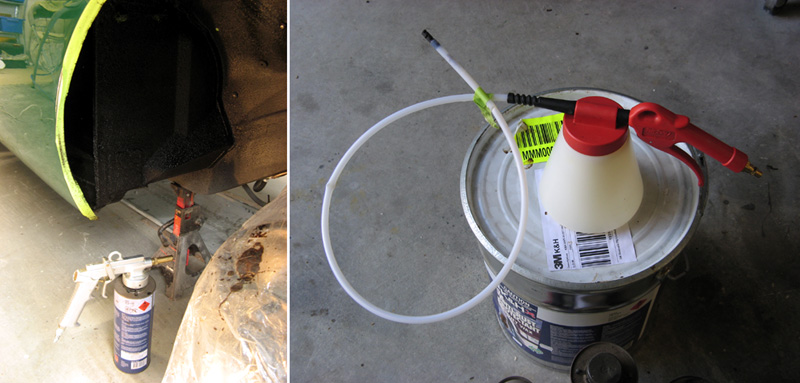
Next I undersealed and rust proofed the car. My undersealing gun screws onto special cans of underseal or
rust proofing stuff you get at the car parts shop. I used K&H cavity way for rustproofing. On easy to
reach areas I used the underseal gun to spray the rust proofing on all over the panels. Areas like
behind the splash panels, inside doors, inside the dog legs and anywhere with easy access. Once the
splash panels behind the front wheels were in place I used the same gun to spray on some more underseal
in the wheel wells. For the parts of the car you don't have easy access, i.e. inside the sills, you use
a different kind of gun. I borrowed this, and a huge tin of cavity wax, off a workmate Mike who also
restores old cars. This kind of gun consists of a pot you put you wax in and a long tube. It's actually
two tubes with one inside the other. One supplies air and the other the wax to a nozzle at the end of
long, flexible pipe. This you poke through holes in the body up into hard to reach areas. You pull the
trigger on the gun and slowly withdraw the tube. Rust proofing is sprayed out of the nozzle as a fine
spray around 180 degrees completely covering the area. I used this several times on all hard to reach
areas of the car and also on the underside. I did it on a really hot day so the rust proofing would flow
nicely and it eventually dripped from the bottom of the car, hence the plastic sheet. It dripped out for
a number of days before stopping.
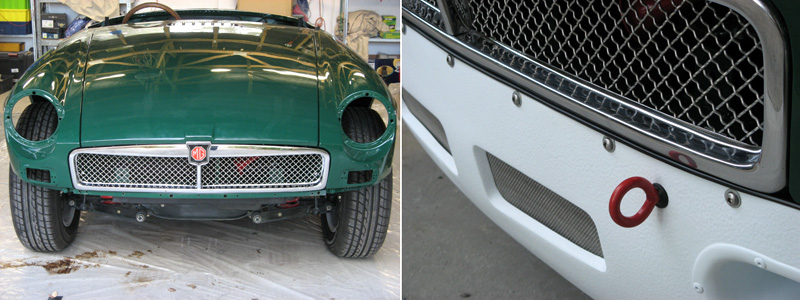
I attached the front grille and the front valence next. The grille needed a small amoutn of adjustment with
a hammer and dolly to make it fit well. I installed it flush with the front of the wings. Some seem to
be recessed slightly but I prefer the flush look, especially with the Sebring valence. The valence was
screwed in place with hex head, button screws. You can see the black fenderwelt betweem the valence and
the car body and botom of the grille.

Next I fitted the windscreen. First you need to glue on the vinyl on top of the scuttle above the dashboard.
This must be in place before the screen is fitted. You should also attach the lift the dot posts for the
tonneau cover at this point too. To fit the screen yourself you need some clever way to lift the flap on
the bottom of the screen frame. This needs to fold out from the curled up position it likes to take on
in order for the screen to be pushed fully down. I used a trick I learned on the MGBBS. You use strips
of duct tape stuck back to back. Take a long strip of tape and across the middle stick on a shorter strip
to make an unsticky area. You then use stick these either side of the screen wrapped around the bottom seal
holding it up and out of the way. The picture should make it clear. Enough of these will hold the rubber
seal up while you press the screen down into place. Then you simple peel the tape off the glass and slide
out from under the seal. As it happened this let me get the screen on the car myself but I still needed a
friend to come and push down on the screen enough to get the two bolts either side in place. That is a
real bugger of a job. It takes a huge amount of force to push the screen down into position. You need to be
very careful you don't cross thread the bolts into the frame as this is only cast aluminium and the threads
could be damaged easily. Make sure the bolts go into the threads before you have the screen on the car. I needed
to tap mine out since I had had the screen frame powdercoated. Also ensure you have the right spacers
between the screen and the body. These prevent the screen legs pulling in when you tighten the attaching bolts
which could result in a cracked screen if they pull in too much! I made mine from some scrap plastic board
(chopping board works well) and some plastic shims which I adjusted until they were right. Removing the light
metal cover that normally lives here makes this easier and you can easily rivet it back in place later. Before
pushing the screen fully down you must also start the two bolts that hold down the spoke attaching plate in
the centre of the screen. These bolts are rather long so if you push the screen fully home you can't get them
in place properly. Start them off into the threads then you can tighten them up fully later.
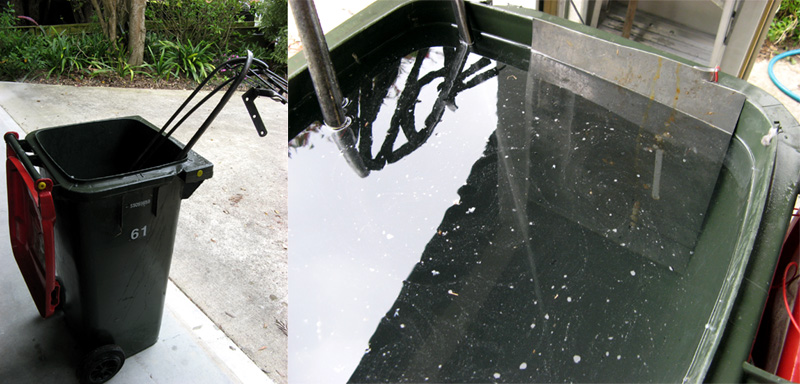
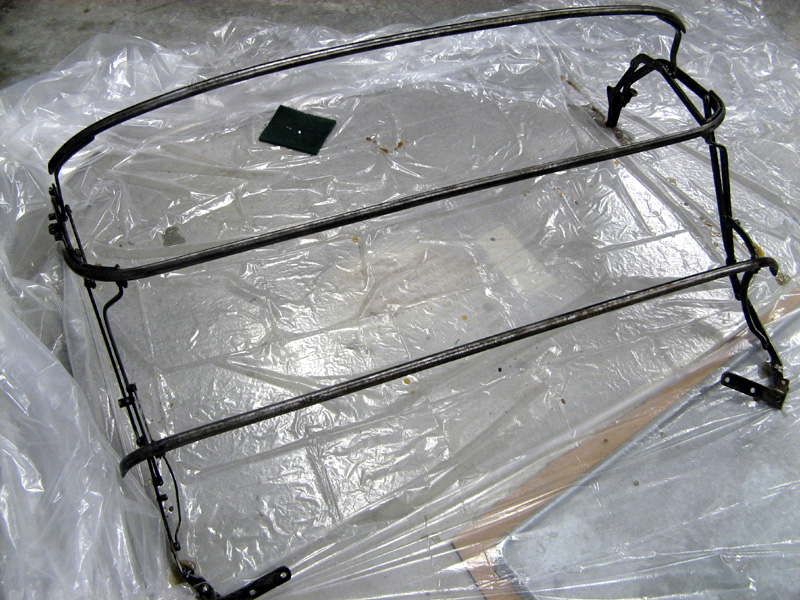
The soft top frame needed some work so I threw it in the bin! The reason becomes clear shortly. First I fixed and
tightened the riveted joints. All the joints in the frame are simply metal rivtet with brass washers with the
ends peened over to hold them. One of them had broken so I simple filed a metal washer to go over the end of
the rivet and welded that in place. The other joints were all loose so I simple hammered them with a ball peen
hammer over a steel block to tighten them up again. The frame was then wire brushed to remove old paint. I
found there was a lot of surface rust on it hence the trick with the rubbish bin. What I did was called
electrolytic rust removal. The frame goes into the bin full of water. Into the water goes some baking soda,
perhaps a hundred grams or so. You only need enough to make the water conductive. Next goes a sheet of
stainless steel not touching the frame. Then you simply connect the positive lead of a 12V battery charger to
the stainless steel sheet (the anode) and the negative lead to the metal frame (the cathode). What happens is
some chemical magic where the rust on the frame gets converted back into iron and can be rubbed off. If you
use normal steel for the anode it will rust as the frame gets clean. Hence using stainless steel. When I did
frame I was getting about 2 Amps of current flow. After a few hours all the rust was converted. I had to do it
in two goes as the frame was too long to fit in the bin in one go.
One out of the bin the rust is all converted to black iron. I then used a green 3M style pad to scrub the frame.
It was then ready to be painted. Make sure there is no water inside the frame before painting! I then hung the
frame up on wires in my spare garage and painted it black.
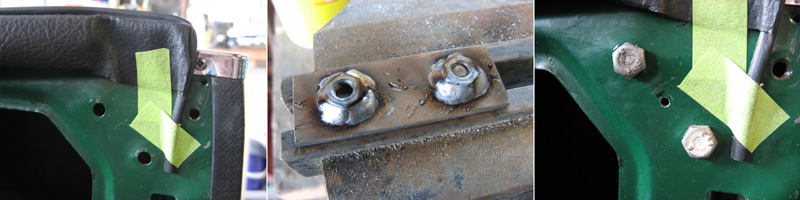
I am actually jumping ahead a bit now in terms of when I did things but it makes sense to explain here. The
soft top frame itself is held onto the body with three screws each side. These normally screw into captive
nuts in the side of the body just behind the doors. Often it seems these nuts break lose. To fix this there
are are various solutions. You can get special nuts that can be fitted in place. I am not sure what they are
called but they are hard to get in imperial sizes. I uses an easier approach to replace the two missing nuts
on one side of my car. I made a small steel plate and holding is behind the panel carefully marked the holes
that the screws needed to go into. I then threaded these holes for the screws. I then screwed two bolts
through these and attached nuts from the other side. These I then MIG welded in place. Threading the plate
and welding on the nuts gave me a deeper thread than just welding on the nuts alone. I believe Paul Hunt
used spare quarterlight mounting nuts which are long threaded inserts. I then drilled a hole through the
panel and the middle of the plate to hold it in place. I found when on the car the frame tended to bind on
itself a little making it hard to fold up or down. You can simply bend various bits of the frame until
it moves freely.
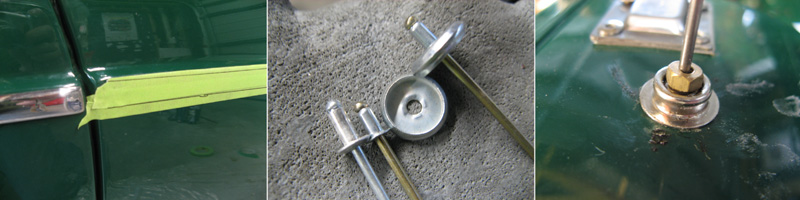
I attached the chrome trim strips on the side of the car. This is one area to get right. A lot of things can be
close enough but if your strips aren't straight it stands out and spoils the look of the car. After
re-assembling the car I found mine weren't straight anymore! I needed to change the position of the right
front strip which was sitting about 1.5 mm out of line where it met the door. That doesn't sound like
much but I could notice it and it drove me mad. To reposition it I simply drilled new holes for mounting the
snap dots. I painted the edged of the old holes and undersealed over them to seal them. Then I ran a tape
strip over the metal and held the chrome in place over that. With it in the correct position I used a sharpie
to trace along it's edges. Then I simply marked a point between the lines to drill and rivet on the snaps.
I didn't use the tiny rivets that came with the snaps but pulled them out and used standard 1/8 rivets instead.
You can see the difference in the picture. Also one trick is to use a nut on the shaft of the rivet when you
rivet it in place. Otherwise the head of the riveter might be too large to fully fit into the snap. Shown
here is a tonneau snap but the principle is the same.
Page 1 - Page 2 - Page 3 - Page 4 - Page 5 - Page 6 - Page 7 - Page 8 - Page 9 - Page 10
Page 11 - Page 12 - Page 13 - Page 14 - Page 15 - Page 16 - Page 17 - Page 18 - Page 19
Page 20 - Page 21 - Page 22 - Page 23 - Page 24 - Page 25